Learning the basics of Fedify
TIP
This tutorial is also available in the following languages: 한국어 (Korean).
In this tutorial, we will build a small federated server that can only accept follow requests to understand the basic concepts of the Fedify framework. Despite its simplicity, it will cover the key features of the ActivityPub protocol and the Fedify framework, such as actors, sending and receiving activities, and the inbox.
This tutorial will not use the quick start project template created by the fedify init command. Instead, we will start from scratch to understand how the Fedify framework works without any boilerplate code.
As prerequisite knowledge, you should have a basic understanding of JavaScript, command-line interfaces, and minimum experience with building web server apps. However, it's perfectly fine if you're not familiar with the ActivityPub protocol or TypeScript; we will explain them as we go.
What we will build
We will build a small federated server which can accept follow requests from other servers. The server will have a single actor (i.e., account) and an inbox to receive follow requests. When the server receives a follow request, it will send an accept activity back to the sender. The home page of the server will list the actor's followers.
Creating a new project
TIP
We recommend using Deno or Bun (which are TypeScript-first) for the best experience, but you can use Node.js if you prefer.
Let's create a new project directory and initialize a new project:
mkdir follow-server
cd follow-server/
echo '{ "unstable": ["kv"] }' > deno.json
deno add jsr:@fedify/fedify
mkdir follow-server
cd follow-server/
echo '{ "type": "module" }' > package.json
bun add @fedify/fedify @deno/kvmkdir follow-server
cd follow-server/
echo '{ "type": "module" }' > package.json
npm add -D typescript tsx @types/node
npm add @fedify/fedify @deno/kv @hono/node-serverThe above commands will create a deno.json (in case of Deno) or package.json (in case of Node.js or Bun) in the project directory with the following content (formatted for readability):[1]
{
  "unstable": ["kv"],
  "imports": {
    "@fedify/fedify": "jsr:@fedify/fedify@^1.1.0"
  }
}
{
"type": "module",
"dependencies": {
"@deno/kv": "^0.8.1",
"@fedify/fedify": "^1.1.0"
}
}{
"type": "module",
"devDependencies": {
"@types/node": "^20.12.7",
"tsx": "^4.8.2",
"typescript": "^5.4.5"
},
"dependencies": {
"@deno/kv": "^0.8.1",
"@fedify/fedify": "^1.1.0",
"@hono/node-server": "^1.11.1"
}
}NOTE
If you use Deno 2.7.0 or later, you do not need any extra setting for Temporal. If you use Deno earlier than 2.7.0, add "temporal" to the "unstable" field in deno.json.
NOTE
In Bun and Node.js, we recommend adding "type": "module" to the package.json file to use ESM imports. While Fedify also supports CommonJS for legacy compatibility, ESM is the preferred and recommended approach.
TIP
Do you wonder why we need to add tsx and @types/node in the case of Node.js? It's because Fedify is written in TypeScript, and Node.js doesn't support TypeScript out of the box. By adding tsx and @types/node, you can write TypeScript code in Node.js without any hassle.
Creating the server
Now, let's create the server script. Create a new file named server.ts in the project directory and write the following code:
Deno.serve(request =>
  new Response("Hello, world", {
    headers: { "Content-Type": "text/plain" }
  })
);Bun.serve({
port: 8000,
fetch(request) {
return new Response("Hello, world", {
headers: { "Content-Type": "text/plain" }
});
}
});import { serve } from "@hono/node-server";
serve({
port: 8000,
fetch(request) {
return new Response("Hello, world", {
headers: { "Content-Type": "text/plain" }
});
}
});It's a simple HTTP server that responds with Hello, world
to any incoming request. You can run the server by executing the following command:
deno run -A server.tsbun server.tsnode --import tsx server.tsNow, open your web browser and navigate to http://localhost:8000/. You should see the Hello, world
message.
As you can guess, Deno.serve() (in case of Deno), Bun.serve() (in case of Bun), and serve() (in case of Node.js) are functions to create an HTTP server. They take a callback function that receives a Request object and returns a Response object. The Response object is sent back to the client.
This server is not federated yet, but it's a good starting point to build a federated server.
Federation object
To make the server federated, we need to use the Federation object from the Fedify framework. The Federation object is the main object that handles ActivityPub activities and actors. Let's modify the server script to use the Federation object:
import { createFederation, MemoryKvStore } from "@fedify/fedify";

const federation = createFederation<void>({
  kv: new MemoryKvStore(),
});
In the above code, we import the createFederation() function from the Fedify framework to create a new Federation object. We pass an object to the createFederation() function, which is the configuration object. The kv property is a key–value store that is used to store several internal data of the Federation object. We use the MemoryKvStore to open a key–value store.
IMPORTANT
Since MemoryKvStore is for testing and development purposes, you should use a persistent key–value store like DenoKvStore (in Deno) or RedisKvStore (from @fedify/redis package) or PostgresKvStore (from @fedify/postgres package) or MysqlKvStore (from @fedify/mysql package) for production use.
For further details, see the Key–value store section.
Then, we pass the incoming Request to the Federation.fetch() method:
Deno.serve(
  request => federation.fetch(request, { contextData: undefined })
);Bun.serve({
port: 8000,
fetch(request) {
return federation.fetch(request, { contextData: undefined });
}
});import { serve } from "@hono/node-server";
serve({
port: 8000,
fetch(request) {
return federation.fetch(request, { contextData: undefined });
}
});The Federation.fetch() method takes the incoming Request and a few options. In this case, we pass undefined as the contextData because we don't need to share any context data here.
TIP
The Federation object is a generic class that takes a type parameter named TContextData. The TContextData type is the type of the context data, which is shared among the actor dispatcher, inbox listener, and other callback functions. The TContextData type can be void if you don't need to share any context data, but it can be any type if you need to share context data.
See TContextData section for more details.
The Federation object is now ready to handle incoming requests. Let's move on to the next step.
TIP
Although it's not mandatory, we highly recommend to set up loggers to see what's going on in the server. To set up loggers, you need to install LogTape first:
deno add jsr:@logtape/logtapebun add @logtape/logtapenpm add @logtape/logtapeThen, you can set up loggers by calling configure() function at the top of the server.ts file:
import { configure, getConsoleSink } from "@logtape/logtape";

await configure({
  sinks: { console: getConsoleSink() },
  filters: {},
  loggers: [
    { category: "fedify",  sinks: ["console"], lowestLevel: "info" },
  ],
});
Actor dispatcher
The Federation object needs an actor dispatcher to handle incoming activities from other servers. The actor dispatcher is a function that is called when an incoming activity is addressed to an actor on the server.
As mentioned earlier, there will be only one actor (i.e., account) on the server. We will name its identifier as me (you can choose any identifier you like).
Let's create an actor dispatcher for our server:
import { createFederation, MemoryKvStore } from "@fedify/fedify";
import { Person } from "@fedify/vocab";
const federation = createFederation<void>({
kv: new MemoryKvStore(),
});
import { createFederation, MemoryKvStore } from "@fedify/fedify";
import { Person } from "@fedify/vocab";
const federation = createFederation<void>({
kv: new MemoryKvStore(),
});
import { createFederation, MemoryKvStore } from "@fedify/fedify";
import { Person } from "@fedify/vocab";
import { serve } from "@hono/node-server";
const federation = createFederation<void>({
kv: new MemoryKvStore(),
});
In the above code, we use the setActorDispatcher() method to set an actor dispatcher for the server. The first argument is the path pattern for the actor, and the second argument is a callback function that takes a Context object and the actor's identifier. The callback function should return an Actor object, a Tombstone if the account is gone, or null if the actor is not found. In this case, we return a Person object for the actor me.
Alright, we have an actor on the server. Let's see if it works by querying WebFinger for the actor. Run the server by executing the following command:
deno run -A server.tsbun run server.tsnode --import tsx server.tsNow, open a new terminal session and run the following command to query the actor:[2]
curl "http://localhost:8000/.well-known/webfinger?resource=acct:me@localhost:8000"The response should look like this (formatted for readability):
{
  "subject": "acct:me@localhost:8000",
  "aliases": [
    "http://localhost:8000/users/me"
  ],
  "links": [
    {
      "rel": "self",
      "href": "http://localhost:8000/users/me",
      "type": "application/activity+json"
    },
    {
      "rel": "http://webfinger.net/rel/profile-page",
      "href": "http://localhost:8000/"
    }
  ]
}
The above response shows that the actor me is found on the server, and its canonical URI is http://localhost:8000/users/me. Let's see what happens when we query the actor's canonical URI (note that the request contains the Accept: application/activity+json header):[2:1]
curl -H"Accept: application/activity+json" http://localhost:8000/users/meThe response should look like this (formatted for readability):
{
  "@context": [
    "https://www.w3.org/ns/activitystreams",
    "https://w3id.org/security/v1",
    {
      "toot": "http://joinmastodon.org/ns#",
      "discoverable": "toot:discoverable",
      "suspended": "toot:suspended",
      "memorial": "toot:memorial",
      "indexable": "toot:indexable"
    }
  ],
  "id": "http://localhost:8000/users/me",
  "type": "Person",
  "name": "Me",
  "preferredUsername": "me",
  "summary": "This is me!",
  "url": "http://localhost:8000/"
}
The response shows the actor me with its basic information.
Requests we've made so far are what ordinary ActivityPub implementations do behind the scenes when they try to look up an actor (i.e., account). For example, when you search with a full handle of an actor on Mastodon, a Mastodon instance queries the WebFinger endpoint to find the actor's canonical URI and then queries the canonical URI to get the actor's profile.
However, you still can't follow the actor me from other ActivityPub servers, because our server is not exposed to the public internet yet. We will cover this in the next section.
TIP
If you are curious about the actor dispatcher further, see the Actor dispatcher section in the manual.
Exposing the server to the public internet
To expose the server to the public internet, generally, you need a proper domain name configured with a DNS record pointing to your server's IP address. However, for local development, you can use the fedify tunnel command to temporarily expose your server to the public internet.
To use fedify tunnel, first make sure you have the fedify command installed. If you haven't installed it yet, please follow the installation instructions in the fedify: CLI toolchain section.
After installing the fedify command, you can expose your server to the public internet by running the following command (note that you need to run this command in a new terminal session so that the server is still running):
fedify tunnel 8000The above command will expose your server to the public internet. You will see a public URL that you can use to access your server from the internet, e.g.:
✔ Your local server at 8000 is now publicly accessible:

https://e875a03fc2a35b.lhr.life/

Press ^C to close the tunnel.
NOTE
Do not rely on fedify tunnel for production use. It is only for local development. The domain name it provides is temporary and will change every time you restart the command.
However, since fedify tunnel is a reverse proxy between the public internet and your server, the server is still not aware of the fact that it is exposed to the public internet through HTTPS. In order to make the server aware of it, you need to place a x-forwarded-fetch middleware in front of the Federation.
To do this, you need to install the package:
deno add jsr:@hongminhee/x-forwarded-fetchbun add x-forwarded-fetchnpm add x-forwarded-fetchThen, import the package and place the behindProxy() middleware in front of the Federation.fetch() method:
import { behindProxy } from "@hongminhee/x-forwarded-fetch";

Deno.serve(
  behindProxy(request => federation.fetch(request, { contextData: undefined }))
);
import { behindProxy } from "x-forwarded-fetch";
Bun.serve({
port: 8000,
fetch: behindProxy((request) => federation.fetch(request, { contextData: undefined })),
});import { serve } from "@hono/node-server";
import { behindProxy } from "x-forwarded-fetch";
serve({
port: 8000,
fetch: behindProxy((request) => federation.fetch(request, { contextData: undefined })),
});To restart the server, you need to stop the server by pressing ^C and then run the server again:
deno run -A server.tsbun run server.tsnode --import tsx server.tsLet's query the actor me again, but this time with the public URL (change the domain name to the one fedify tunnel provides you):[2:2]
curl "https://e875a03fc2a35b.lhr.life/.well-known/webfinger?resource=acct:me@e875a03fc2a35b.lhr.life"
curl -H"Accept: application/activity+json" https://e875a03fc2a35b.lhr.life/users/me
Does it work? If so, congratulations! Your server is now exposed to the public internet. However, you still can't follow the actor me from other ActivityPub servers because our server doesn't accept follow requests yet.
TIP
There are alternatives to fedify tunnel. See also the Exposing a local server to the public section in the manual for more details.
Inbox listener
In ActivityPub, an inbox is where an actor receives incoming activities from other actors. To accept follow requests from other servers, we need to register an inbox listener for the actor me.
Let's register an inbox listener for the actor me. First, every activity is represented as a class in the Fedify framework. The Follow class represents the Follow activity. We will use the Follow class to handle incoming follow requests:
import { createFederation, MemoryKvStore } from "@fedify/fedify";
import { Follow, Person } from "@fedify/vocab";
Then, we register an inbox listener for the Follow activity:
federation
  .setInboxListeners("/users/{identifier}/inbox", "/inbox")
  .on(Follow, async (ctx, follow) => {
    if (follow.id == null || follow.actorId == null || follow.objectId == null) {
      return;
    }
    const parsed = ctx.parseUri(follow.objectId);
    if (parsed?.type !== "actor" || parsed.identifier !== "me") return;
    const follower = await follow.getActor(ctx);
    console.debug(follower);
  });
Yet, the above code doesn't do anything other than printing the follower's information to the console. We will send an accept activity back to the sender when we receive a follow request in the next section, but here we just see who the follower is.
In order to test the inbox listener, the actor me needs to point out its inbox URI in the actor object. Let's modify the actor dispatcher to include the inbox URI:
federation.setActorDispatcher("/users/{identifier}", async (ctx, identifier) => {
  if (identifier !== "me") return null;
  return new Person({
    id: ctx.getActorUri(identifier),
    name: "Me",
    summary: "This is me!",
    preferredUsername: identifier,
    url: new URL("/", ctx.url),
    inbox: ctx.getInboxUri(identifier),  // Inbox URI
  });
});
Now, let's restart the server and look up the actor me again, but this time on your Mastodon instance (or any other ActivityPub server you have account on). To look up the actor me, you need to search with the full handle of the actor (i.e., @me@your-server-domain):
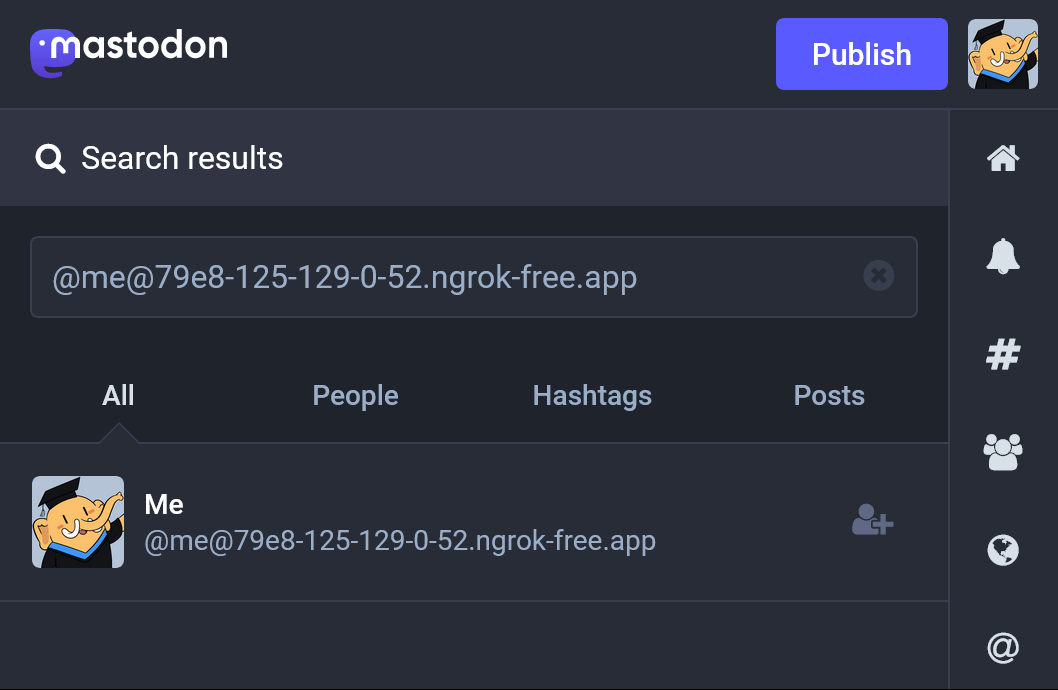
When you find the actor me, click on the actor's profile and then click on the Follow button. You should see your Mastodon account sending a follow request to the actor me on the console where the server is running:
Person {
  id: URL "...",
  name: "...",
  ... omitted for brevity ...
}
However, the server doesn't send an accept activity back to the sender yet. We will cover this in the next section.
TIP
If you are curious about the inbox listener further, see the Inbox listeners section in the manual.
Generating a key pair
To send an activity, first, we need to generate a key pair for the actor me so that the server can sign the activity with the private key. Fortunately, Fedify provides helper functions to generate and export/import keys:
import {
  createFederation,
  exportJwk,
  generateCryptoKeyPair,
  importJwk,
  MemoryKvStore,
} from "@fedify/fedify";
import { Follow, Person } from "@fedify/vocab";
By the way, when should we generate a key pair? In general, you should generate a key pair when the actor is created. In our case, we generate a key pair when the actor me is dispatched for the first time. Then, we store the key pair in the key–value store so that the server can use the key pair later.
The setKeyPairsDispatcher() method is used to set a key pairs dispatcher for the actor. The key pairs dispatcher is a function that is called when the key pairs of an actor is needed. Let's set a key pairs dispatcher for the actor me. setKeyPairsDispatcher() method should be chained after the setActorDispatcher() method:
const kv = await Deno.openKv();  // Open the key–value store

federation
  .setActorDispatcher("/users/{identifier}", async (ctx, identifier) => {
    if (identifier !== "me") return null;
    return new Person({
      id: ctx.getActorUri(identifier),
      name: "Me",
      summary: "This is me!",
      preferredUsername: identifier,
      url: new URL("/", ctx.url),
      inbox: ctx.getInboxUri(identifier),
      // The public keys of the actor; they are provided by the key pairs
      // dispatcher we define below:
      publicKeys: (await ctx.getActorKeyPairs(identifier))
        .map(keyPair => keyPair.cryptographicKey),
    });
  })
  .setKeyPairsDispatcher(async (ctx, identifier) => {
    if (identifier != "me") return [];  // Other than "me" is not found.
    const entry = await kv.get<{
      privateKey: JsonWebKey;
      publicKey: JsonWebKey;
    }>(["key"]);
    if (entry == null || entry.value == null) {
      // Generate a new key pair at the first time:
      const { privateKey, publicKey } =
        await generateCryptoKeyPair("RSASSA-PKCS1-v1_5");
      // Store the generated key pair to the Deno KV database in JWK format:
      await kv.set(
        ["key"],
        {
          privateKey: await exportJwk(privateKey),
          publicKey: await exportJwk(publicKey),
        }
      );
      return [{ privateKey, publicKey }];
    }
    // Load the key pair from the Deno KV database:
    const privateKey = await importJwk(entry.value.privateKey, "private");
    const publicKey =  await importJwk(entry.value.publicKey, "public");
    return [{ privateKey, publicKey }];
  });
import { serialize as encodeV8, deserialize as decodeV8 } from "node:v8";
import { openKv } from "@deno/kv";
// Open the key–value store:
const kv = await openKv("kv.db", { encodeV8, decodeV8 });
federation
.setActorDispatcher("/users/{identifier}", async (ctx, identifier) => {
if (identifier !== "me") return null;
return new Person({
id: ctx.getActorUri(identifier),
name: "Me",
summary: "This is me!",
preferredUsername: identifier,
url: new URL("/", ctx.url),
inbox: ctx.getInboxUri(identifier),
// The public keys of the actor; they are provided by the key pairs
// dispatcher we define below:
publicKeys: (await ctx.getActorKeyPairs(identifier))
.map(keyPair => keyPair.cryptographicKey),
});
})
.setKeyPairsDispatcher(async (ctx, identifier) => {
if (identifier != "me") return []; // Other than "me" is not found.
const entry = await kv.get<{
privateKey: JsonWebKey;
publicKey: JsonWebKey;
}>(["key"]);
if (entry == null || entry.value == null) {
// Generate a new key pair at the first time:
const { privateKey, publicKey } =
await generateCryptoKeyPair("RSASSA-PKCS1-v1_5");
// Store the generated key pair to the Deno KV database in JWK format:
await kv.set(
["key"],
{
privateKey: await exportJwk(privateKey),
publicKey: await exportJwk(publicKey),
}
);
return [{ privateKey, publicKey }];
}
// Load the key pair from the Deno KV database:
const privateKey = await importJwk(entry.value.privateKey, "private");
const publicKey = await importJwk(entry.value.publicKey, "public");
return [{ privateKey, publicKey }];
});import { openKv } from "@deno/kv";
const kv = await openKv("kv.db"); // Open the key–value store
federation
.setActorDispatcher("/users/{identifier}", async (ctx, identifier) => {
if (identifier !== "me") return null;
return new Person({
id: ctx.getActorUri(identifier),
name: "Me",
summary: "This is me!",
preferredUsername: identifier,
url: new URL("/", ctx.url),
inbox: ctx.getInboxUri(identifier),
// The public keys of the actor; they are provided by the key pairs
// dispatcher we define below:
publicKeys: (await ctx.getActorKeyPairs(identifier))
.map(keyPair => keyPair.cryptographicKey),
});
})
.setKeyPairsDispatcher(async (ctx, identifier) => {
if (identifier != "me") return []; // Other than "me" is not found.
const entry = await kv.get<{
privateKey: JsonWebKey;
publicKey: JsonWebKey;
}>(["key"]);
if (entry == null || entry.value == null) {
// Generate a new key pair at the first time:
const { privateKey, publicKey } =
await generateCryptoKeyPair("RSASSA-PKCS1-v1_5");
// Store the generated key pair to the Deno KV database in JWK format:
await kv.set(
["key"],
{
privateKey: await exportJwk(privateKey),
publicKey: await exportJwk(publicKey),
}
);
return [{ privateKey, publicKey }];
}
// Load the key pair from the Deno KV database:
const privateKey = await importJwk(entry.value.privateKey, "private");
const publicKey = await importJwk(entry.value.publicKey, "public");
return [{ privateKey, publicKey }];
});In the above code, we use the setKeyPairsDispatcher() method to set a key pairs dispatcher for the actor me. The key pairs dispatcher is called when the key pairs of an actor is needed. The key pairs dispatcher should return an array of objects that contain the private key and the public key of the actor. In this case, we generate a new key pair at the first time and store it in the key–value store. When the actor me is dispatched again, the key pairs dispatcher loads the key pair from the key–value store.
NOTE
Although we use the Deno KV database in this tutorial, you can use any other your favorite database to store the key pair. The key–value store is just an example.
Restart the server and make an HTTP request to the actor me using curl. Now you should see the actor me with the public key in the response:
{
  "@context": [
    "https://www.w3.org/ns/activitystreams",
    "https://w3id.org/security/v1",
    {
      "toot": "http://joinmastodon.org/ns#",
      "discoverable": "toot:discoverable",
      "suspended": "toot:suspended",
      "memorial": "toot:memorial",
      "indexable": "toot:indexable"
    }
  ],
  "id": "https://e875a03fc2a35b.lhr.life/users/me",
  "type": "Person",
  "inbox": "https://e875a03fc2a35b.lhr.life/users/me/inbox",
  "publicKey": {
    "id": "https://e875a03fc2a35b.lhr.life/users/me#main-key",
    "type": "CryptographicKey",
    "owner": "https://e875a03fc2a35b.lhr.life/users/me",
    "publicKeyPem": "-----BEGIN PUBLIC KEY-----\nMIICIjANBgkqhkiG9w0BAQEFAAOCAg8AMIICCgKCAgEA0kptPO/arJVTv1qBzISP\nhJC8MZSut20FHZuJFON/kTscQT19eP2zGC9qDnQVl1vOXrvFybPWMjQP4p2x1/VM\np0wnY2EzKsdU4+lKfHsjd0VU2+TJvPtZ/AqJAG3PLMXeN7E5RpeUTwdTr9fkyrHE\n0M8n8yWG1AMtXp5pzhR/Le8uHmuSjbgJxIZPZOj8T6ZdMXKxudF0H/i0IB60lN9D\nt5tOzajmE5jvZD0mapdIDhghidGBu77fgopKmBtNn3IDjLJLXIh3dp7NICl1czHB\ntVtU1c2kmNPXq1WSndQgokN4CXNoy/BqTKo4VhIOWWb/oGaTZOWflFM5EXWTJUxK\n8JFyCD/1KVJXYEd662y+r400oDJqHKHhG78yud83PD4bpbJm/t7BD7RgO95g/rpN\nwi8mjLQVp7Y9ttXGf3lEgbBPZfPr0pm3X4ppoDAwtzVO7RmfboSb9ECa9uwQc1VG\nse3yNi7bDrHIu+HjBzk+glELcW2Hj4t4s/PPX9g0fH3UHgME1Pysz3Y8OZZeJlTu\n1yYcCg9X/dMV1qxxon6b8XhIEttW+RZjJunmtzOt1sKf2NM2jPXv+ZmFRao1eOzo\nvcVI/eeXV+1LDhHtTQJGnLObqnHnVdg3Qiaao176KOxrKh4/l6kJmaq/pw8+ZSkE\nzxUovxHGCJ0UqqgcaPsBsJMCAwEAAQ==\n-----END PUBLIC KEY-----"
  },
  "name": "Me",
  "preferredUsername": "me",
  "summary": "This is me!",
  "url": "https://e875a03fc2a35b.lhr.life/"
}
Alright, we have the public key of the actor me. Let's move on to the next section to send an accept activity back to the sender when we receive a follow request.
TIP
If you are curious about the key pairs dispatcher further, see the Public keys of an Actor section in the manual.
Sending an Accept activity
When the server receives a follow request, it should send an Accept or Reject activity back to the sender. The Accept activity is a response to the follow request and indicates that the follow request is accepted.
Let's import the Accept class from the Fedify framework:
import {
  createFederation,
  exportJwk,
  generateCryptoKeyPair,
  importJwk,
} from "@fedify/fedify";
import {
  Accept,
  Follow,
  Person,
} from "@fedify/vocab";
Then, we modify the inbox listener to send an Accept activity back to the follower when we receive a follow request:
federation
  .setInboxListeners("/users/{identifier}/inbox", "/inbox")
  .on(Follow, async (ctx, follow) => {
    if (follow.id == null || follow.actorId == null || follow.objectId == null) {
      return;
    }
    const parsed = ctx.parseUri(follow.objectId);
    if (parsed?.type !== "actor" || parsed.identifier !== "me") return;
    const follower = await follow.getActor(ctx);
    if (follower == null) return;
    // Note that if a server receives a `Follow` activity, it should reply
    // with either an `Accept` or a `Reject` activity.  In this case, the
    // server automatically accepts the follow request:
    await ctx.sendActivity(
      { identifier: parsed.identifier },
      follower,
      new Accept({ actor: follow.objectId, object: follow }),
    );
  });
Restart the server, and make a follow request from your Mastodon account to the actor me. You should see the server immediately accept the follow request.
TIP
If you are curious about sending activities further, see the Sending activities section in the manual.
Listing followers
The server should list the actor's followers on the home page. To do this, we need to store the followers in the key–value store. We will store each Follow activity's ID as the key and the follower's actor ID as the value:
federation
  .setInboxListeners("/users/{identifier}/inbox", "/inbox")
  .on(Follow, async (ctx, follow) => {
    if (follow.id == null || follow.actorId == null || follow.objectId == null) {
      return;
    }
    const parsed = ctx.parseUri(follow.objectId);
    if (parsed?.type !== "actor" || parsed.identifier !== "me") return;
    const follower = await follow.getActor(ctx);
    if (follower == null) return;
    await ctx.sendActivity(
      { identifier: parsed.identifier },
      follower,
      new Accept({ actor: follow.objectId, object: follow }),
    );
    // Store the follower in the key–value store:
    await kv.set(["followers", follow.id.href], follow.actorId.href);
  });
Now, we need to make the home page to show the actor's followers. Let's modify the script inside the fetch function:
Deno.serve(async (request) => {
  const url = new URL(request.url);
  // The home page:
  if (url.pathname === "/") {
    const followers: string[] = [];
    for await (const entry of kv.list<string>({ prefix: ["followers"] })) {
      if (followers.includes(entry.value)) continue;
      followers.push(entry.value);
    }
    return new Response(
      `<ul>${followers.map((f) => `<li>${f}</li>`)}</ul>`,
      {
        headers: { "Content-Type": "text/html; charset=utf-8" },
      },
    );
  }

  // The federation-related requests are handled by the Federation object:
  return await federation.fetch(request, { contextData: undefined });
});Bun.serve({
port: 8000,
async fetch(request) {
const url = new URL(request.url);
// The home page:
if (url.pathname === "/") {
const followers: string[] = [];
for await (const entry of kv.list<string>({ prefix: ["followers"] })) {
if (followers.includes(entry.value)) continue;
followers.push(entry.value);
}
return new Response(
`<ul>${followers.map((f) => `<li>${f}</li>`)}</ul>`,
{
headers: { "Content-Type": "text/html; charset=utf-8" },
},
);
}
// The federation-related requests are handled by the Federation object:
return await federation.fetch(request, { contextData: undefined });
}
});serve({
port: 8000,
async fetch(request) {
const url = new URL(request.url);
// The home page:
if (url.pathname === "/") {
const followers: string[] = [];
for await (const entry of kv.list<string>({ prefix: ["followers"] })) {
if (followers.includes(entry.value)) continue;
followers.push(entry.value);
}
return new Response(
`<ul>${followers.map((f) => `<li>${f}</li>`)}</ul>`,
{
headers: { "Content-Type": "text/html; charset=utf-8" },
},
);
}
// The federation-related requests are handled by the Federation object:
return await federation.fetch(request, { contextData: undefined });
}
});The above code lists the actor's followers on the home page. The followers are stored in the key–value store, and we retrieve the followers from the key–value store and display them on the home page.
Restart the server and navigate to the home page in your web browser. You should see the actor's followers in the bulleted list.
NOTE
Although the above code handles the home page before the federation-related requests, it is just an example. In a real-world application, you should integrate Fedify with a web framework like Hono, where the order of handling requests is reversed: the federation-related requests are handled before other web-related requests.
For more details, see the Integration section.
Linting your federation code
As your federated server grows, it's important to maintain code quality and catch common mistakes early. Fedify provides the @fedify/lint package with linting plugins for both Deno Lint and ESLint, which include specialized linting rules for federation code.
The @fedify/lint package helps you avoid common pitfalls such as:
- Using incorrect actor IDs (e.g., relative URLs instead of
Context.getActorUri()) - Missing required actor properties (inbox, outbox, followers, etc.)
- Incorrect URL patterns for actor collections
- Missing public keys or assertion methods
For example, if you had written the actor dispatcher like this:
// ❌ Wrong: Using relative URL
federation.setActorDispatcher(
  "/{identifier}",
  (_ctx, identifier) => {
    return new Person({
      id: new URL(`/${identifier}`),  // ❌ Linter will catch this
      name: "Example User",
    });
  },
);
The linter would warn you:
error[fedify-lint/actor-id-mismatch]: Actor's `id` property must match
`_ctx.getActorUri(identifier)`. Ensure you're using the correct context method.
This helps you catch mistakes before they cause issues in production.
TIP
For detailed setup instructions, available rules, and configuration options, see the Linting section in the manual.
Wrapping up
Congratulations! You have built a small federated server that can accept follow requests and list the actor's followers. You have learned the key features of the ActivityPub protocol and the Fedify framework, such as actors, sending and receiving activities, and the inbox.
In this tutorial, we have covered the following topics:
- Creating a new project
- Creating the server
Federationobject- Actor dispatcher
- Exposing the server to the public internet
- Inbox listener
- Generating a key pair
- Sending an
Acceptactivity - Listing followers
You can extend the server by adding more features, such as sending other activities, handling other types of activities, and implementing other callback functions. The Fedify framework provides a wide range of features to build a federated server, and you can explore them by reading the manual and the API reference.
If you have any questions or feedback, feel free to ask in the Fedify community on Matrix or the GitHub Discussions.
Exercises
Implement unfollowing feature: Listen to the
Undoactivity and remove the follower from the key–value store when the server receives anUndoactivity.Integration with a web framework: In the above example, we hard-coded the home page inside the callback function passed to
Deno.serve()(in case of Deno),Bun.serve()(in case of Bun), andserve()(in case of Node.js). This is not enough for a real-world application as you would need to rendering HTML templates, handling media files, and so on. Instead, you can use a web framework like Hono or Fresh to utilize the proper routing system and JSX templates to produce HTML.See also the Integration section in the manual for more details.